When you’re staring at an empty raised bed, you’ll quickly come to the realization that you have a large area to fill. It’s amazing how much soil you need to fill a raised bed. You can obviously go to the local garden center, purchase soil and begin filling your bed. But what I chose to do is to create a hugelkultur raised bed.
A what?
Let’s find out.
What is a Hugelkultur Raised Bed?
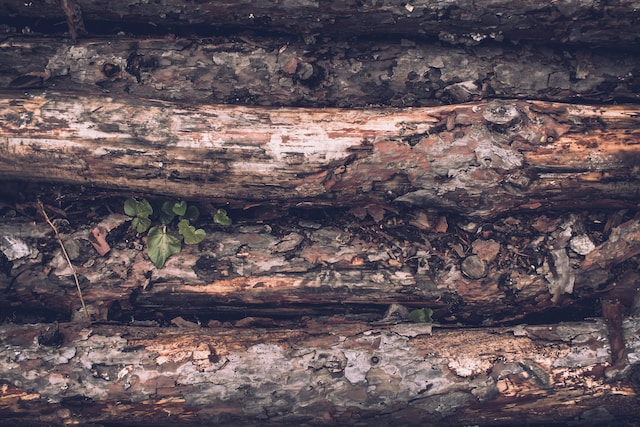
Hugelkultur is a practice that has grown out of Germany and Eastern Europe. The word’s meaning acts as a hint for this practice of “mound culture” or “mound bed.” The practice goes back centuries, and it revolves around filling an area, not necessarily a bed, but a space with:
- Rotting logs
- Plant debris
You can clear land, fill in the area with wood material and then add some soil on top. Adding in the wood material allows you to create a larger mound and reduce the need for as much soil and compost.
My land is filled with trees, and I had a lot of logs leftover from clearing, so it only made sense for me to make hugelkultur raised beds. I had ample wood for the practice, and it’s much easier to fill in some of these deeper beds with logs and yard debris.
Before explaining exactly how to create one of these raised beds, let’s look at some of the many benefits of hugelkultur.
Benefits of a Hugelkultur Raised Bed
Note: I’m going to discuss using hugelkultur in a raised bed, but you can make your own mound of debris using this practice without a bed, too. The benefits will remain the same in both cases.
Okay, so you have all of these rotting wooden particles and plant debris filled in a space. Add a bit of soil and compost, and now what? What’s the purpose? Right?
There are many benefits of using hugelkultur:
Leverage Permaculture to Fill Beds (or Your Growing Space)
Filling a single raised bed that is 8’L x 4’W x 1’H will require at least 15 bags of soil or maybe a little more. That’s a ton of soil. Well, permaculture techniques are one of your best options because you can use the wood and plant debris that you already have taking up space in your yard.
And you get to clean up your yard as an added perk.
You’ll be using the following materials to fill the space or bed:
- Branches
- Logs
- Plant debris
- Leaves
Save Money
Soil is expensive when you’re buying dozens of bags for a single raised bed. Add in compost and fertilizer, and you’ll spend a decent amount of money just filling a growing space before you even get to start growing anything.
You’ll fill the space once with all of these items, and since it’s free material, you’ll have more money to spend on buying seeds and plants to grow.
Decomposition Heats the Soil
If you have a compost bin, you know that the middle starts to emit steam. It’s neat when you mix up your compost in the middle of winter and feel a gush of heat from it. The heat results from the decomposition process, which occurs naturally.
Well, the wood and plant debris will also begin to decompose in your bed soil and start to warm it from the inside.
How much warmer will the soil be?
I’m not 100% sure. Composting can generate a ton of heat, but I haven’t seen any concrete figures on the heat inside of one of these beds. However, most people agree that the heat generation is less and tends to be about 80°F.
So, in theory, if you have a cold night or even a frost, there’s a chance that your plants will still survive.
Biodiverse Soil
Hugelkultur creates a biodiverse soil that is more natural. Your ground’s soil is unlikely to be 100% perfect without putting a lot of work into it. When you add in different woods and branches, it mimics a forest ground with all of the spongy material and microorganisms that exist.
In essence, your hugelkultur bed will have soil filled with:
- Microorganisms
- Insects
- Aeration
Since you’re likely using wood, branches and debris from your own yard, you’re creating your own biosphere with your bed. We’ve even heard some gardeners state that plants in this environment are more resilient, but I’m not able to verify this claim.
Less Demand for Water
Your hugelkultur raised bed will drain better than compact soil, but there’s another perk that can’t be overlooked: less demand for water. You’ll need to water your bed as usual, but the bottom layer will act as a sponge.
The rotting wood will absorb the water and release it over time, requiring less water.
If you’re in a drought, you’ll use less water and your plants will be happier than if you had them in a traditional raised bed. With that said, don’t take the lower demand for water for granted because you still need to water the bed.
Otherwise, you’ll come out to a bed of very unhappy or dead plants that are dying for a drop of water.
Overcome Rocky Soil
Rocky soil or soil that is in dire need of reconditioning requires a lot of work. Our family lives on top of a mountain, and there is just rock after rock after rock. Digging into the ground, hoping to find anything but a pile of rocks, is wishful thinking.
Blueberries grow amazingly on our soil, and they’re everywhere naturally.
But the only way for us to overcome the rocky soil in a way that didn’t take years or a ton of money is through:
- Raised beds
- Hugelkultur beds
If you look at hugelkultur mounds, you’ll find plenty of examples of people doing this right on the ground. Often, they’ll make a giant mound, a few feet wide and high and not even put it in a bed. They may use bricks around the base to keep the soil in place or even build up the mound against an embankment or between big rocks or boulders.
💡But what if I don’t have wood, branches or the like on my land to use?
If you don’t have wood and plant debris that you can use for your hugelkultur, this may not be a good practice for you. However, you can often find downed trees or rotting wood in parks, on the side of the road or in any heavily wooded areas.
I’m sure that you can buy some logs to follow this technique with your raised beds, but the cost may not justify the benefits.
Building Hugelkultur Raised Beds
Alright, you’re ready to give hugelkultur a try and want to make your own raised beds. We recommend buying a bed to make this as simple as possible, but the choice is 100% yours.
With that said, once you have the bed in place and need to begin filling it, this is where the practice of hugelkultur comes into play. You can begin with the following:
Layer 1: Fill the bottom 5% of the bed
A thin layer of material needs to fill the bottom 5% of the bed with the hopes of preventing weeds and grass from growing. You’ll need to use something like cardboard, wood chips or even boards for this layer.
You can also use other materials to stop weeds from growing.
If you skip this step, you risk weeds and plants coming through your beds and competing with the plants you’re trying to grow.
Layer 2: 40-45% wood
Next, you’ll want to fill up to 45% of the space with wood. If you have rotting wood, it will work better than freshly cut wood. You want to avoid using:
- Treated wood of any kind
- Black walnut, spruce, yew, willow
A general rule of thumb is to avoid woods like black walnut, which are known to contain toxins that prevent plant growth. You’ll want to do your own research here because your area may or may not have trees that are optimal for growth.
You can and should mix soft and hardwoods if you have the opportunity because the softwoods will begin to decompose faster and allow for a nice mix of nutrient release for your beds.
Layer 3: 10% – 15% plant waste and debris
If you add 40% wood, add 15% plant waste. Otherwise, adjust to 10% plant waste. You’ll need this layer to help the wood layer begin to decompose. You’ll want to add in:
- Fallen leaves
- Grass clippings
- Weeds
- Any other plant debris that you have
When we did this for our bed, we tried filling in any gaps that were between the pieces of wood inside of the bed with leaves, clippings and anything else that we had laying around. Once you’re confident with your third layer, you have two additional steps to take and you’re just about done.
Layer 4: 10% compost
You need to add in some of the nutrient-rich compost that you have or purchase some. We didn’t have our compost bins up at this point in the process, so we bought some to add to the bed.
A few good options for compost include:
- Manure (if growing flowers)
- Organic compost (veggies and fruits)
You’ll want to do your research here to choose a compost type that works best for the types of plants that you’re adding to your bed.
Layer 5: 30% or so of organic soil
Finally, add in your organic soil and fill the remainder of the bed with it. You can use a rake to smooth out the topsoil and make it easier to tend to your plants.
And that’s it.
You can also take out a hose and wet the raised bed or wait for a good rain. If you find that the soil isn’t healthy or the bed isn’t draining water properly or holding it, add some peat moss. The great thing about peat moss is that it holds onto water for the root of the plants and also promotes drainage.
Soil that is too compact will make it challenging for roots to break through and water to drain deeper into the soil.
Tips for Success With Hugelkultur
Before you begin filling your bed, you need to follow a few tips to improve your chance of success:
- Remove any grass or weeds from the floor of the bed
- Cover the bottom of the bed with cardboard or similar material to prevent weeds and grass from sprouting up
- Review your spot multiple times a day to ensure that the bed receives enough sunlight for the plants that you plan on growing
Once the bed is in place, you’ll want to treat it like any other bed and maintain it properly. We’re going to cover maintenance in greater detail in the next section, but a few additional tips for your hugelkultur raised bed include:
- Fill in the gaps between the wood well because otherwise, rodents will love the little home that you built for them
- Set aside additional time for filling your bed because the process is always more intensive than you assume
- If making a mound and not using the bed, the top of the hill always tends to dry out faster than the rest of the bed, so be prepared to water this area more often
- Check the soil pH and adjust as necessary to achieve the right pH level
- Irrigation remains a very important part of creating one of these beds, so be sure to consider a drip irrigation system, too
- Lining your bed is crucial to stop weed growth, so don’t neglect the cardboard layer or use landscape fabric on the bottom to prevent weed growth
- Experiment with a variety of plants to see what grows well in your new bed during the first year
I’m sure that there are zillion things that could have been listed above, but these are great tips for getting your hugelkultur raised beds to produce decent yields.
Still not sure if this way to fill your bed is a good option?
Read through our guide: How To Fill A Raised Garden Bed for more information on how to fill beds the old-fashioned way.
Maintaining Your Hugelkultur Raised Beds
Maintaining your bed isn’t time-intensive and can be done after the growing season. Of course, during the season, you’ll need to remove any weeds or transplants that have made their way into your bed.
But you’ll need to follow this same concept with any raised bed that you own.
With that said, you’ll want to maintain your hugelkultur raised bed by following these tips:
- Add compost or fertilizer on top, and fill in any gaps on the side, too
- Till the soil
- Check the pH and add in any additions necessary, such as lime, to raise your soil’s pH level
That’s really it. You can add any additional soil or anything you need at this time in preparation for the next growing season.
A hugelkultur raised bed is a great way to fill your raised bed and does have a lot of unique benefits, such as feeding the soil over time. Decomposition also heats the soil.
That said, some people like this method, and others do not.
The first two years of my own hugelkultur raised bed did really, really well.
We had more tomatoes than we knew what to do with, but this year, I’m wondering why my bed isn’t doing as well. I did start a week or two later than I would like, but there’s also the issue with the first month or six weeks of growth have been:
- Unusually cooler
- Rainy – lots of rain
- Lots of clouds
We seem to be having a good bit of sun right now and growth is increasing every day, but I always have it in the back of my mind: would a regular soil bed have performed better than my hugelkultur raised bed? I will never know. But the first two years produced a lot of produce.