Drip irrigation for raised beds puts an end to dried-out plants, slow or non growth and hours of manual watering. If you want your vegetable garden to thrive, you need to water it diligently. Home gardeners put a lot of time and effort into composting, planning out their beds, spacing, trying to improve drainage, and then take a lax approach to watering.
You might come home late and say, “I’ll water the garden tomorrow,” and then a busy, stressful week comes to an end with your plants’ water demands not being met.
Drip irrigation kits make it easier for you to water your plants and prevent inconsistent watering.
And it’s so easy to install an irrigation system. I know with our garden beds, I kept putting off installing drip irrigation and kept using our garden hose. Part of me was intimidated by the installation process, and the other part was, honestly, being lazy.
I’ll explain how drip irrigation systems work, how to meet your plants’ water demands and discuss how to install drip irrigation in your bed(s). Plus, I’ll share a handy checklist with everything you need to install your system.
How Does Drip Irrigation Work?
For many plants, it’s better to soak the soil than water too often. Ideally, you’ll soak the soil down to the root system, which for some plants, such as tomatoes, can be 10 inches. If you’re using a hose, you’ll likely move on to the next plant before you reach this depth and will:
- Need to water more often
- Starve the plant from the water necessary to grow
Plus, uneven watering is a lot more common when you’re in charge of the watering.
A garden bed drip irrigation system works like this:
Tubing and Emitters
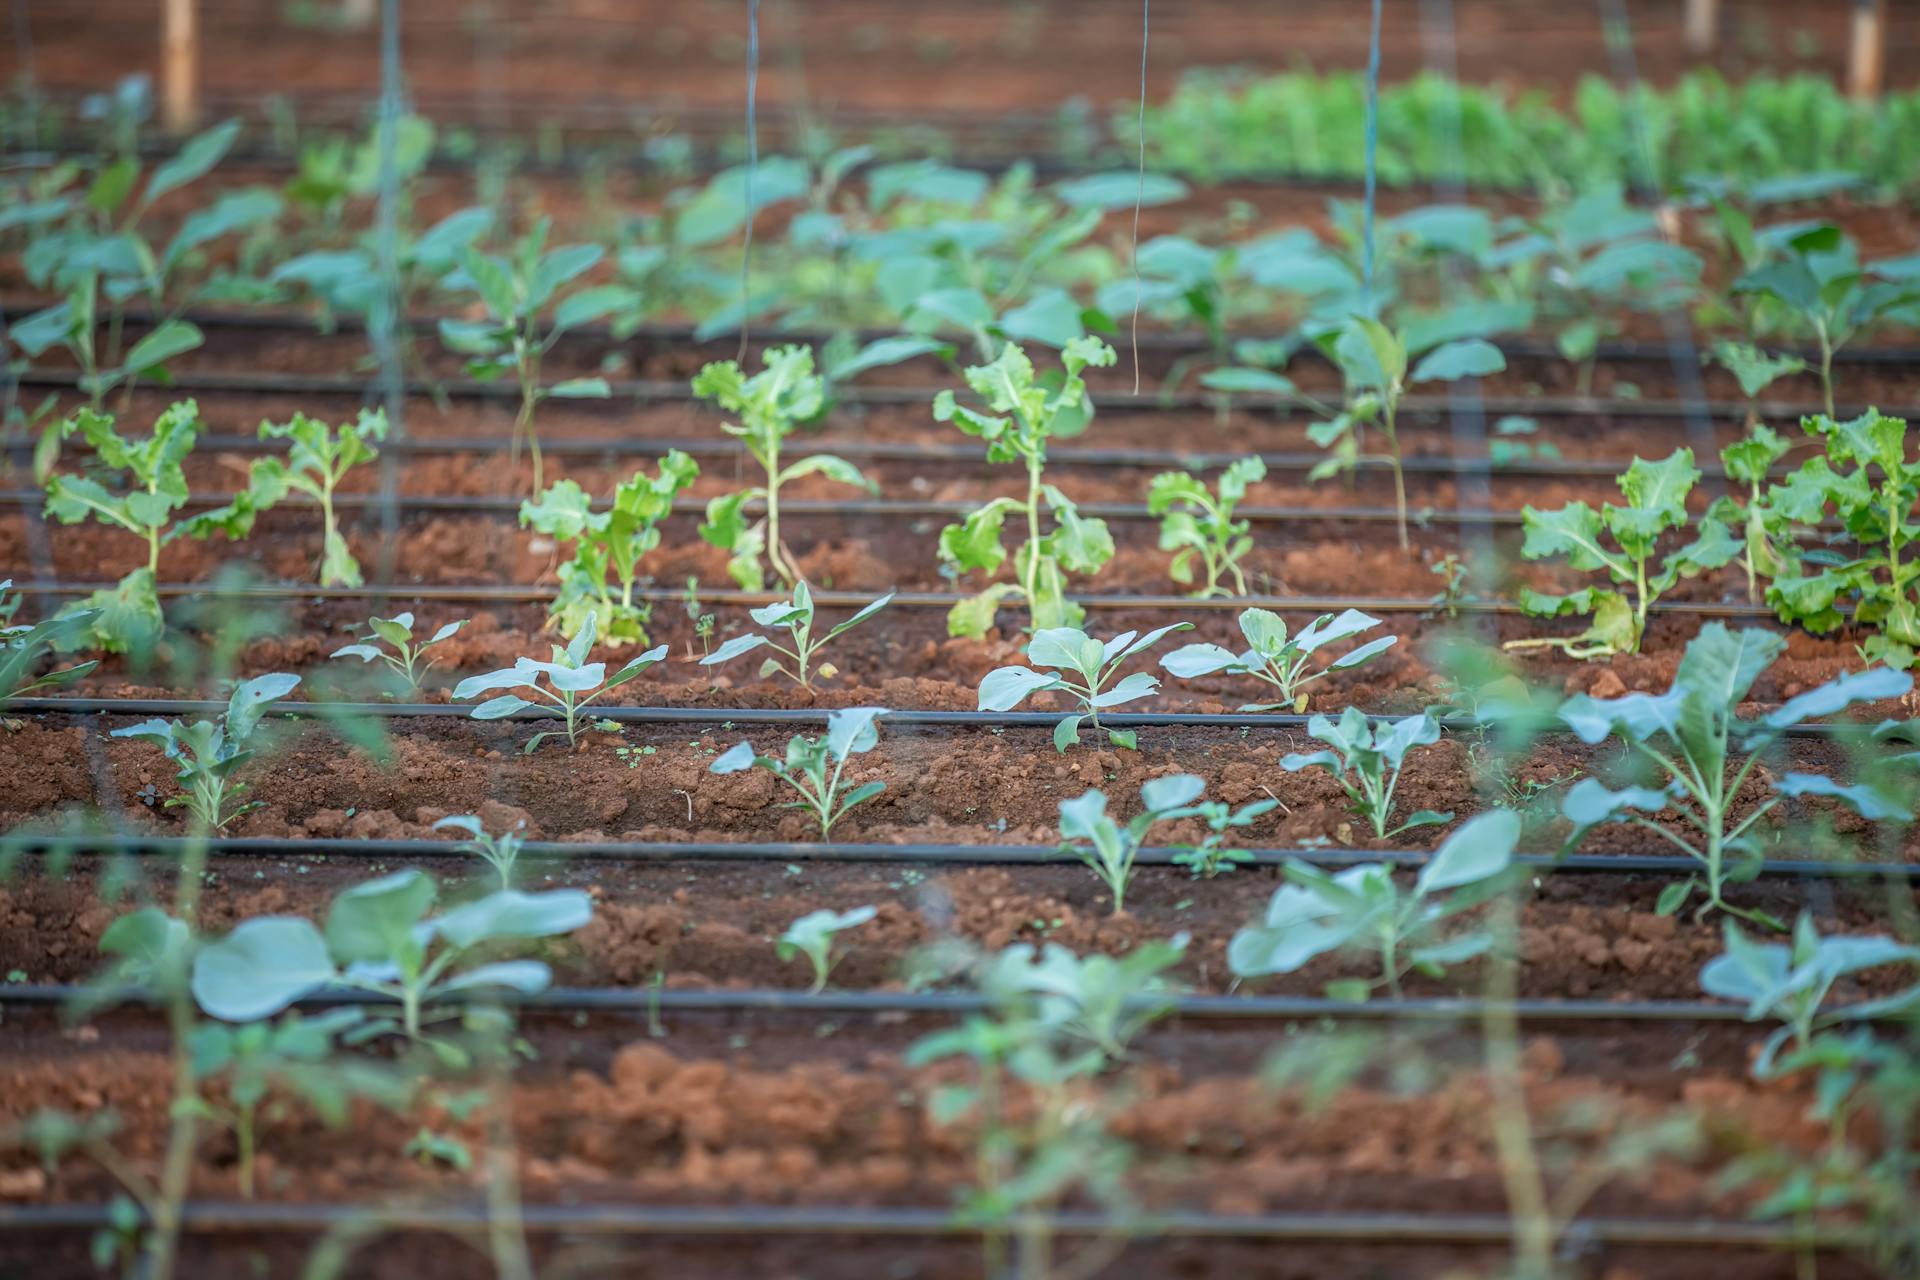
Emitter tubing is placed along the root of each plant, to allow direct watering that’s efficient and doesn’t risk harming the plant. After all, are you watering the roots or the leaves of the plant?
You want to water the roots.
Drip tubing comes in many diameters, lengths and types, but you don’t want your tubing to exceed 200 feet from the mainline tubing because water pressure may suffer. While there are ways around this, we’ll be discussing that in a future article.
Emitters use drip heads to disperse the water.
Mainline Tubing
Your mainline tubing is the tube that connects from your main water source to the valve. Connected to your valve are your sub-mains, which are water line offshoots that can be customized to offer watering zones and more control.
Water Control Valves Manage the Water
Drip irrigation for raised beds is all about control. You don’t want to soak the ground day and night. Controlling the flow of water is the job of the flow valve. Manual and automatic watering options are available, but the main idea is that these valves control the water entering the sub-mains.
Pressure Regulators
If you have very high water pressure, you risk too strong of a flow rate and can even damage your plants in the process. Your pressure regulator will minimize the pressure to allow for water conservation and less risk of harming your plants.
Along with all of these components, drip irrigation systems may also have:
- Filters to reduce clogs
- Tube adapters
- End plugs
- Fittings to attach tubes to your system
- Stakes to keep the tubing in place
If you have a DIY raised garden bed, you may be tempted to make a DIY drip irrigation system. You can make your own system by buying each component separately and putting it together, but it’s almost always easier to use a drip irrigation starter kit.
Kits will come with everything you need for smaller gardens, but if you’re gardening at scale, you may have no other option but to design your own system.

How to Plan Your Irrigation System
Planning a drip irrigation for raised beds comes down to a few things:
- Total distance of the beds
- Distance from the main water source
- Water pressure
- Bed size
- Emitters
Your emitters must be placed at the root of the plant to disperse water and will be staked into the ground. If you prefer not to use an emitter, soaker hoses are a great alternative and easier to put together than a traditional drip irrigation system.
So, what you’ll need to do when planning out your system is:
- Consider how many emitters you’ll need
- Ensure that your hoses are of adequate length
- Measure water pressure to ensure it doesn’t get too low at long distances
Note: If you have strong water pressure of 40+ PSI, a pressure valve is ideal. Don’t know what pressure your water is? Install a pressure valve just in case.
What You’ll Need to Get Started With a Drip Irrigation System
If you want to install your drip irrigation system, I recommend that you purchase a ready-made kit. Kits will cost $40 – $50+, but they’re well worth the investment because they come with everything that you need:
- Automatic timer
- Couplers
- Elbow brackets
- Emitters
- End plugs
- Mainline tubing
- Pressure regulator
- T splitters
- Tubing
- Water connector
- Water control valve
Grab our printable drip irrigation checklist!
Lower-cost ones often won’t include a pressure regulator or filter, but that is something you can add on your own if you like. If you’re buying a kit, look through all of the components it includes and buy any additional ones that you may need. Don’t forget landscaping pins or stakes to keep your tubes in place. Some plumber’s tape will also come in handy and is something I highly recommend.
If you want to buy a drip irrigation starter kit, consider CARPATHEN Drip Irrigation System or Rain Bird LNDDRIPKIT.
Both kits are basic, and while they’re meant for smaller setups, they’re a good entry into irrigation systems and are more than affordable.
Your local hardware store or garden center will likely have everything you need, too. Home Depot near me is often more affordable than Amazon, but items are also not shipped to your door.
How to Install Your Drip Irrigation System
Once you have everything you need, you can start installing your system. If you have a kit, just follow the directions that they provide because they’ll be far more thorough than I can be. A typical setup will follow this sort of installation process:
- Connect the T connector to your outdoor spigot where you attach your hose.
- Attach your timer if you have one.
- Attach the pressure regulator if you have strong pressure and need to lower it.
- Attach all of your hosing, adding connectors as necessary and elbow brackets.
- Place the tubing in the raised bed along with your emitters at the root of the plants.
- Test out your setup and adjust as necessary.
If you’re concerned about the tubing making your garden beds look too industrial, you can try burying them. But with a raised bed, this can be a little more complicated.
Ideally, once you have everything setup and ready to go, you’ll water once in the morning and an additional time if necessary. If it rains a lot one day, adjust your watering to conserve water and avoid over-watering your garden beds.
Tips for Spacing Drip Irrigation for Your Raised Beds
Drip irrigation for raised beds can be complicated because, sometimes, your planting will be 6” apart and other times a foot or more apart. If you’re planting in rows, an emitter spacing of 6” will often work well.
Each bed should have its own shut off valve for better control of your water flow.
If you plant tightly together, the additional water won’t hurt the bed, so plan to meet the needs of your tight spacing setup.
Why Should You Install Drip Irrigation Rather Than Watering Using a Hose?
Watering by hose works and if you don’t want to invest in drip irrigation for raised beds, it just means that you’ll spend more time watering. If you don’t mind putting the work in, continue using a hose.
But if you want to automate watering, install drip irrigation.
Drip irrigation will:
- Conserve water by focusing only on the root of the plants
- Save you time so that you can focus on eliminating pests and feeding your plants
- Produce healthy plants that are happier because you’re watering evenly and consistently
- Reduce the risk of disease on the stems and leaves of many plants
And if you use an automatic water timer, you can enjoy 100% hands-free watering. If you’re like most gardeners who worry about who will water their plants when they go on vacation, automated water irrigation systems for your raised beds will be a complete game-changer.
Plus, by watering at the plant root, you reduce the risk of weeds popping up and thriving between your rows of plants.


